Choosing the right Sliding Glass For Shower can change how a bathroom feels and functions. Clear glass can make a small room appear wider, while textured glass offers more privacy. However, appearance should not lead every decision. Daily use, available space, cleaning habits, and installation conditions matter just as much.
This guide presents 10 practical tips for selecting shower sliding glass with greater confidence. It considers glass thickness, safety glazing, door size, track quality, rollers, seals, and water control. A precise measurement is essential. Even a small error can cause uneven movement, leaks, or difficult installation. Checking product specifications and consulting a qualified installer can also reduce avoidable problems.
Real bathrooms rarely match showroom displays. Hard water may leave cloudy marks on clear panels. Heavy doors may expose weak hardware over time. Some attractive finishes may require more frequent care than expected. That is easy to overlook. The best choice balances design, safety, durability, and maintenance rather than chasing the lowest price. The recommendations ahead are based on practical bathroom considerations and established installation principles. Still, every space has limitations, and a careful review of wall conditions, drainage, and user needs remains necessary before purchasing.
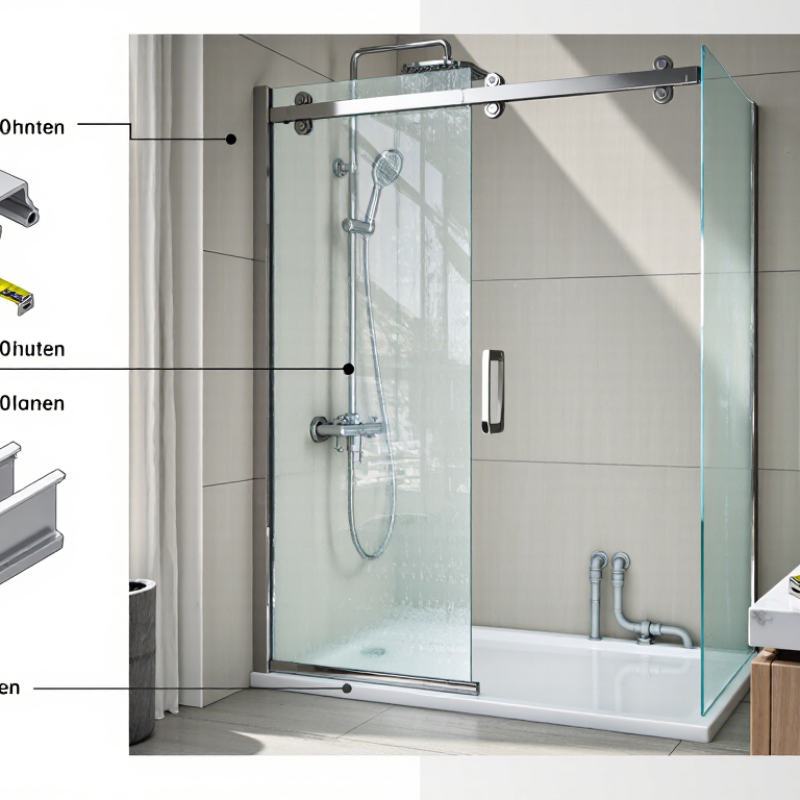
Choosing shower glass starts with safety, not appearance. Tempered glass is heat-treated for stronger impact resistance than ordinary glass. When it breaks, it usually crumbles into smaller, less dangerous pieces. Look for glass marked as compliant with ANSI Z97.1, a recognized safety glazing standard. Ask the supplier for test documentation, not only verbal assurance. Reliable records should identify the glass type, thickness, and testing basis.
Clear glass gives a bright, open feeling. Frosted or patterned glass offers more privacy and hides water spots better. I have found that thicker glass can feel more stable, but thickness alone does not guarantee safe installation. Edges must be polished, corners protected, and holes professionally prepared. Sliding rollers should move smoothly without forcing the panels. Small defects matter.
Measure the opening carefully, including walls that are slightly out of square. Check whether the selected hardware suits the glass weight. Confirm local building requirements before ordering. A safety mark can fade or become difficult to read after installation, so photograph it beforehand. My own mistake was focusing too much on a spotless appearance. Water stains soon changed that judgment. Maintenance matters, too. Ask how the surface should be cleaned, and avoid harsh tools that may scratch the glass.
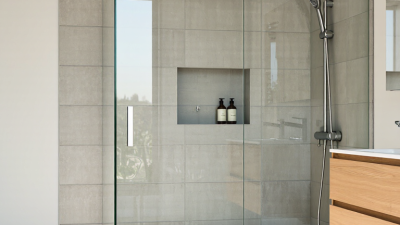
Choosing shower glass is not only a style decision. Thickness affects strength, handling, hardware demand, and visual weight. National Glass Association technical guidance commonly describes fully tempered glass as about four times stronger than annealed glass of similar size. However, thickness alone does not guarantee safety.
Six-millimetre glass suits many compact residential enclosures. It feels light and keeps narrow bathrooms visually open. It also places less load on hinges and wall fixings.
Eight-millimetre glass offers a stronger middle ground. The door feels steadier when opened, while the sightline remains relatively clean. For wider panels, this balance is often practical.
Ten-millimetre glass creates a solid, luxury appearance. It resists flexing better, but the added mass requires accurately installed hinges, channels, and anchors. Heavy glass is not automatically better.
Industry testing follows standards such as ANSI Z97.1 and ASTM C1048, which assess safety glazing performance and tempering quality. These standards do not excuse poor installation. Edge chips, drilled holes, uneven walls, or stressed fittings can weaken a properly tempered panel. I have seen a thick door feel unsafe because its hinge alignment was poor. That detail is easy to overlook.
Measure the opening carefully. Check the wall structure, door width, and hardware load rating before selecting 10 mm. For many homes, 6 mm is efficient, 8 mm is balanced, and 10 mm is a deliberate visual choice. The honest answer depends on the enclosure, not thickness alone.
Choosing sliding glass for a shower starts with accurate measurements, not attractive hardware. Measure the finished opening after tile, waterproofing, and trim are complete. Record the door width, panel width, overall height, and wall-to-wall clearances. Measure at the top, middle, and bottom. Walls often vary slightly. Use the smallest width when ordering, and record every dimension to 1/16 inch.
A steel tape can bend, so keep it straight and level. Check plumb with a level, then measure the sill depth and nearby fixtures. Allow space for rollers, seals, handles, and door overlap. A few millimeters can affect smooth movement.
The 2024 U.S. Houzz Bathroom Trends Study reports that 84% of homeowners upgrade shower fixtures during bathroom renovations.
That demand makes precise planning more important, especially in compact bathrooms. Still, this statistic does not replace a site inspection.
Confirm the glass thickness, safety glazing, and enclosure requirements with a qualified installer. ANSI Z97.1 covers safety glazing performance, while local codes may add installation requirements. Ask for a written measurement sheet before fabrication. I once treated a narrow wall as perfectly square and missed a small offset. The door worked, but the seal looked uneven. That mistake was avoidable. Measure twice, photograph the corners, and question any dimension that seems unusually clean.
Low-E coatings are often misunderstood in shower design. The U.S. Department of Energy reports that low-E windows can reduce glass heat loss by 30–50%. However, a shower enclosure is usually not an exterior thermal barrier. Its energy benefit may be modest. Compare emissivity, coating position, edge protection, and resistance to cleaning chemicals. A coating is not magic. I would also check whether repeated wiping can damage its surface.
Hardware loads deserve equal attention. A 10-millimeter glass panel weighs about 25 kilograms per square meter. A 1-by-2-meter panel can approach 50 kilograms before hardware is added. Ask for tested roller loads, cycle testing, track deflection, and adjustment limits. ANSI Z97.1 and CPSC 16 CFR 1201 address safety glazing, but they do not prove every sliding system will remain smooth for years. That distinction is easy to miss.
Water-spot resistance depends strongly on local water quality. The U.S. Geological Survey classifies water above 120 milligrams per liter as hard, based on calcium carbonate. Mineral marks may appear quickly on clear glass in such areas. Compare documented cleanability testing, not vague claims like “easy-clean.” Look for results after repeated wetting and drying cycles. A squeegee still matters. I sometimes prefer ordinary glass with disciplined maintenance over an expensive coating that lacks test details. Reliability is less glamorous, but it shows at the bathroom threshold.
Choosing sliding glass for a shower requires more than measuring the opening. In the United States, ask for documentation showing compliance with 16 CFR 1201 safety-glazing requirements. This federal standard addresses impact performance for architectural glazing. Do not rely on a sales label alone. Check the certificate, permanent marking, and installation instructions. Local building rules may add requirements. A qualified installer should confirm them before drilling. Measure twice. Paperwork matters.
Examine every exposed edge under bright side lighting. It should look polished, even, and free from chips, sharp corners, or cloudy grinding marks. Tiny damage can worsen when the panel moves through its track. Run a clean fingertip along the edge only when the glass is safely supported. Never test an unsecured panel. Tempered glass cannot be cut after treatment, so replacement may be the only practical correction. I have seen attractive panels fail closer inspection. Looks can mislead.
Maintenance needs should influence the design. Choose accessible rollers, corrosion-resistant hardware, and a track that drains easily. After each shower, use a squeegee to reduce mineral spots and standing water. Clean with a soft cloth and a non-abrasive product approved for glass and hardware. Avoid harsh powders; they can dull finishes and scratch surfaces. Inspect rollers, seals, and fasteners monthly. A stiff door is not “normal.” It may signal debris, misalignment, or loose hardware. My checklist is imperfect, but it catches problems earlier than waiting for noise or leaks. Ask for written care instructions and keep them nearby.
| Tip | Selection Dimension | What to Check | Practical Guidance | Why It Matters |
|---|---|---|---|---|
| 1 | Safety glazing compliance | Look for safety-glazing documentation stating compliance with 16 CFR Part 1201 and the applicable ANSI Z97.1 requirements. | Use properly tested and permanently marked safety glazing for shower doors and other hazardous locations. Confirm that the documentation applies to the exact glass construction being supplied. | Shower enclosures are impact-prone areas. Safety glazing is designed to reduce the risk of large, sharp shards if breakage occurs. |
| 2 | Glass thickness | Verify the specified thickness, commonly 6 mm or 10 mm for framed or semi-frameless applications, depending on the engineered system. | Do not select thickness by appearance alone. The door width, height, hardware, support spacing, and enclosure design must be checked by the installer or engineer. | Thickness affects weight, rigidity, hardware loading, and installation requirements; thicker glass is not automatically safer in every configuration. |
| 3 | Glass type and treatment | Confirm whether the panel is tempered safety glass and whether any protective coating is compatible with the cleaning products used in the bathroom. | Tempered glass cannot be cut, drilled, or reshaped after tempering. Final dimensions and hardware holes must be approved before fabrication. | Incorrect post-tempering modification can cause failure, while incompatible coatings may stain, haze, or lose performance. |
| 4 | Edge quality | Inspect exposed edges for smooth polishing, consistent arrises, chips, cracks, shelling, and sharp transitions around cut-outs. | Request polished or suitably finished exposed edges, especially at the door leading edge, pull-handle area, and visible fixed-panel edges. Reject glass with damage that extends into the panel. | Good edge finishing improves handling safety and reduces local stress concentrations that can contribute to breakage. |
| 5 | Door dimensions and clearances | Measure the finished opening at multiple points and check plumb, level, wall conditions, curb slope, and required overlap. | Allow adequate clearance for the sliding panel, rollers, seals, handles, and cleaning access. Account for out-of-square walls before ordering custom glass. | Accurate measurements help prevent binding, water leakage, uneven gaps, and costly fabrication errors. |
| 6 | Sliding hardware capacity | Check the complete roller, track, guide, stop, and support system for the selected glass weight and panel dimensions. | Use hardware with a stated load rating that exceeds the calculated door weight. Ensure the wall or header can carry the track and operating loads. | Insufficient hardware capacity can cause noisy movement, premature wear, misalignment, or unsafe door detachment. |
| 7 | Water-management features | Review bottom sweeps, jamb seals, overlapping panels, threshold design, and the slope directing water toward the drain. | Choose seals that can be replaced and keep the sliding path clear of excessive silicone or debris. A shower door is not a substitute for a properly waterproofed enclosure. | Effective water management limits splash-out, protects surrounding finishes, and reduces mold-friendly moisture accumulation. |
| 8 | Cleaning and maintenance needs | Ask for the approved cleaning method and confirm whether the surface treatment requires special care. | After use, squeegee or wipe the glass to reduce mineral deposits. Clean regularly with a non-abrasive, pH-neutral product unless the glass or hardware instructions specify otherwise. | Routine removal of soap film and hard-water residue helps preserve transparency, seals, rollers, and protective finishes. |
| 9 | Corrosion and bathroom environment | Evaluate the resistance of exposed hardware, fasteners, rollers, and tracks to humidity, cleaning chemicals, and coastal or high-chloride conditions. | Prefer corrosion-resistant components and rinse away aggressive cleaners. Keep drain holes and track channels free of standing water and buildup. | Corrosion can increase rolling resistance, discolor the enclosure, weaken components, and shorten service life. |
| 10 | Inspection and serviceability | Confirm that rollers, guides, seals, stops, and fasteners are accessible for adjustment or replacement. | After installation, inspect for chips, cracks, loose hardware, abnormal movement, and glass-to-metal contact. Stop using the door if damage or severe binding is found. | Early maintenance can prevent progressive damage and supports safe, smooth operation over the life of the enclosure. |